Alternative - use subtree
For git experts.
The following instructions explain how to publish company_model in your project folder’s ScopeFoundryHW directory using Git.
We recommend the following folder structure, which can be generated with ScopeFoundry.tools.
├── your_project_folder/
   ├── ScopeFoundryHW/
      ├── company_model/
         ├── company_model_hw.py
         ├── Licence
         ├── README.md
         # optional
         ├── company_model_dev.py
         ├── company_model_test_app.py
         ├── .gitignore
         ├── docs/
            ├── links.json
         ├── ** more files/directories that make your hardware component work

    **
We recommend using the following .gitignore file, as it is generally not advisable to track measurement and log data:
# .gitignore
*.pyc
*.h5
*log*.txt
New in ScopeFoundry 2.1. This is equivalent to publish manually described bellow.
Install Git and make a GitHub account
Install GitHub CLI
Ensure you have the GitHub CLI installed. You can install it using conda:
conda install gh --channel conda-forge
Set Up GitHub Authentication The first time you use the publishing tools, you may need to authenticate with GitHub. Follow the prompts to generate and use a personal access token if required.
gh auth login
and follow the prompts to give the CLI an access token.
Navigate to your_project_folder and use the following command to start the tools to publish your hardware component:
python -m ScopeFoundry publish_hw
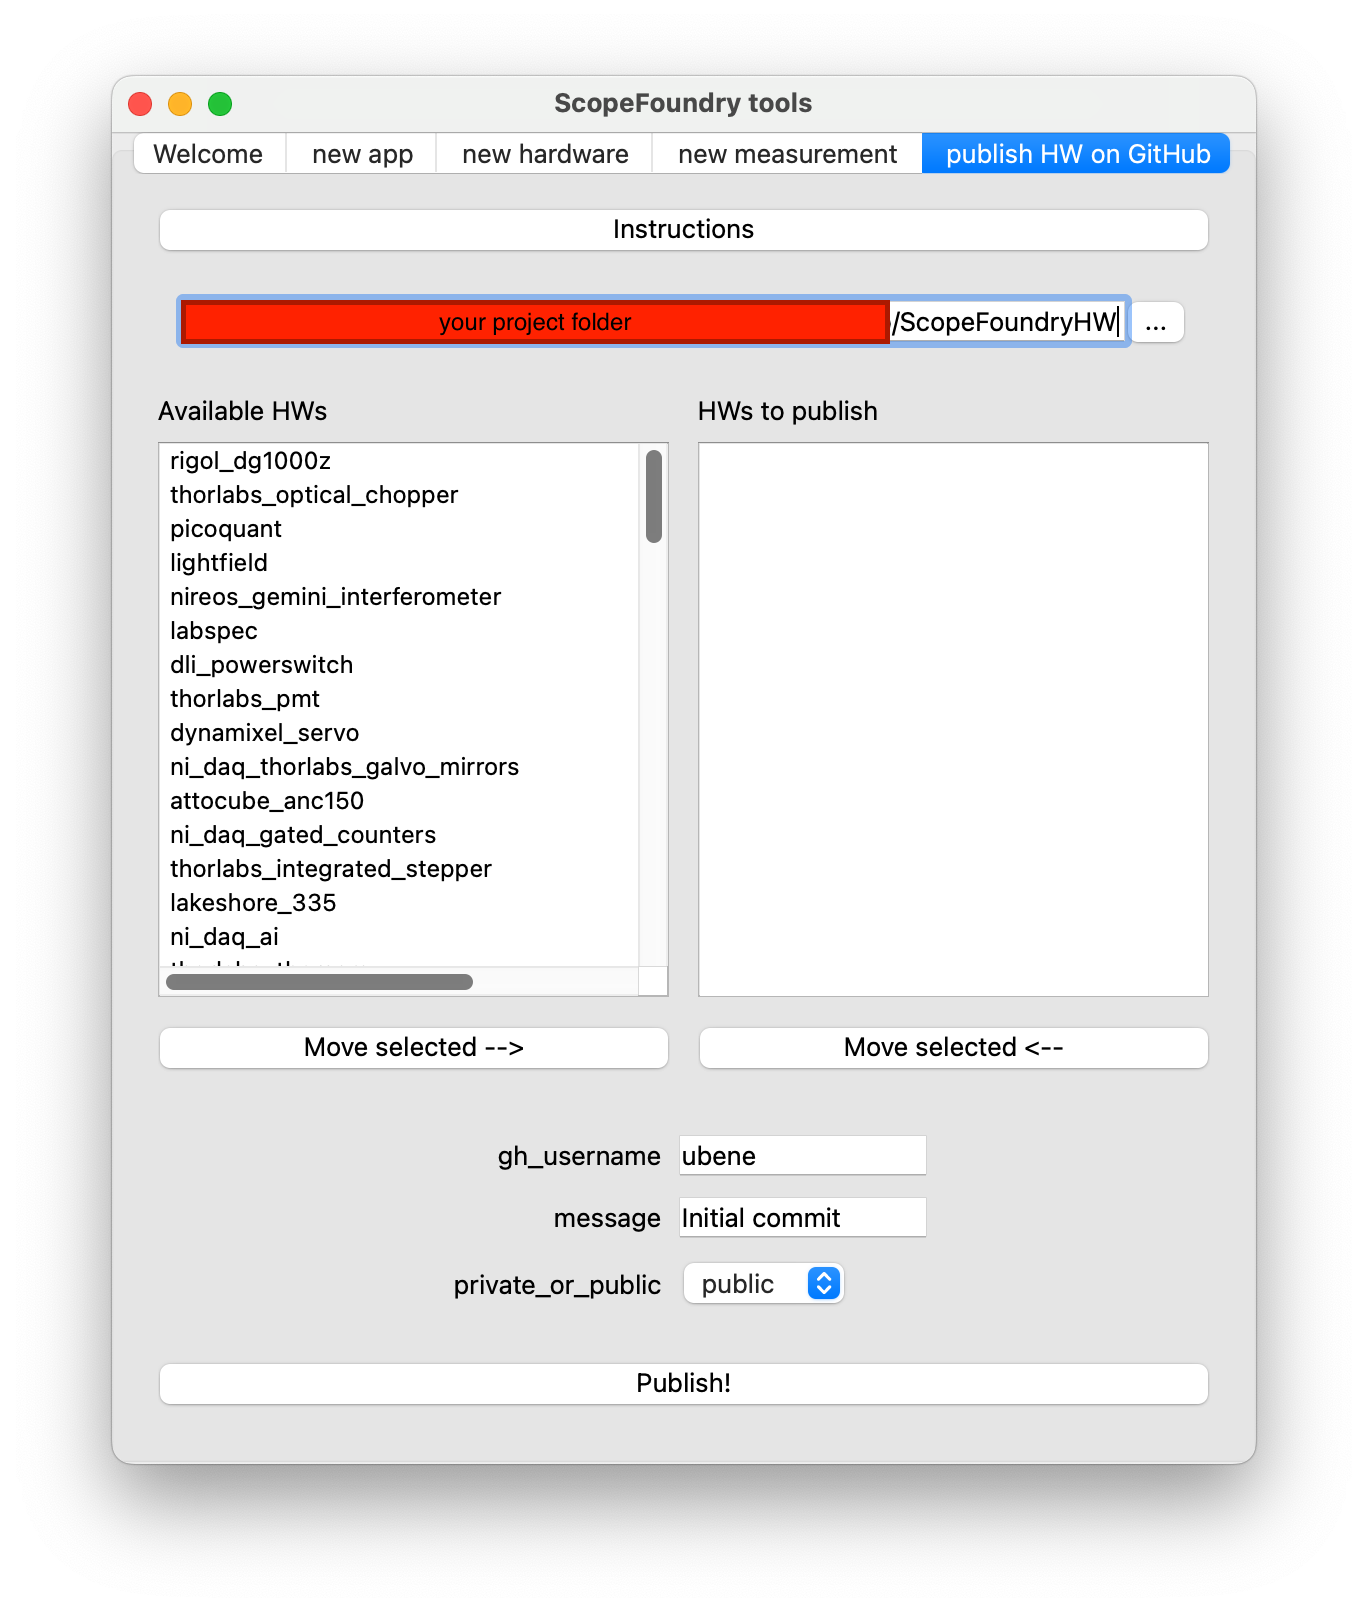
The left list should contain a list of available hardware components. If not, make sure that the path above the lists points to your ScopeFoundryHW folder. On the right side, you will see a list of hardware components that will be published. Use the buttons to move items between lists. Fill out the remaining fields and hit Publish!
This page periodically crawls GitHub for HW_* repositories. It considers users/organizations that forked the ScopeFoundry repository. Your hardware repository will be found if:
HW_.To clone an existing repo on GitHub into to your project’s hardware folder, navigate to your project folder (cd to/your_project_folder/) and use the following command (requires Git):
git clone https://github.com/{THEIR_USER_NAME}/HW_{company_model}.git ScopeFoundryHW/{company_model}
Where {THEIR_USER_NAME} and {company_name} need to be replaced accordingly. Hint: The entries in the Library contain this line completed for the respective HardwareComponent.
Note: The HW_ prefix is removed in the target folder name.
If you plan to share changes you make to this code, it is wise to first fork the repository and then clone the forked version (see below).
If it is your repository, i.e you have write access, then simply push to it and you are done.
Otherwise:
USER_NAME.Now you have a GitHub repository URL (with your USER_NAME) of the form: https://github.com/{USER_NAME}/HW_{company_model}.git.
Navigate to the folder of the hardware component:
cd to/your_project_folder/ScopeFoundryHW/{company_model}
Commit your code. To wrap all changes in one commit (not necessarily recommended):
git add -A && git commit -m "Describe your contribution"
Push your code to the remote repository:
git remote add origin https://github.com/{USER_NAME}/HW_{company_model}.git
git push -u origin
To share your contributions with the original owner, create a Pull Request on GitHub, and they can decide if they like to merge your contributions.
This is equivalent to publish with tools described above.
Initialize a Git repository locally (cd ScopeFoundryHW/{company_model}):
git init --initial-branch=main
Commit your code. For the first commit, assuming you commit all files at once:
git add -A && git commit -m "Initial release"
Create the target repository on GitHub by prepending HW_ to the package name:
USER_NAME.HW_{company_model}.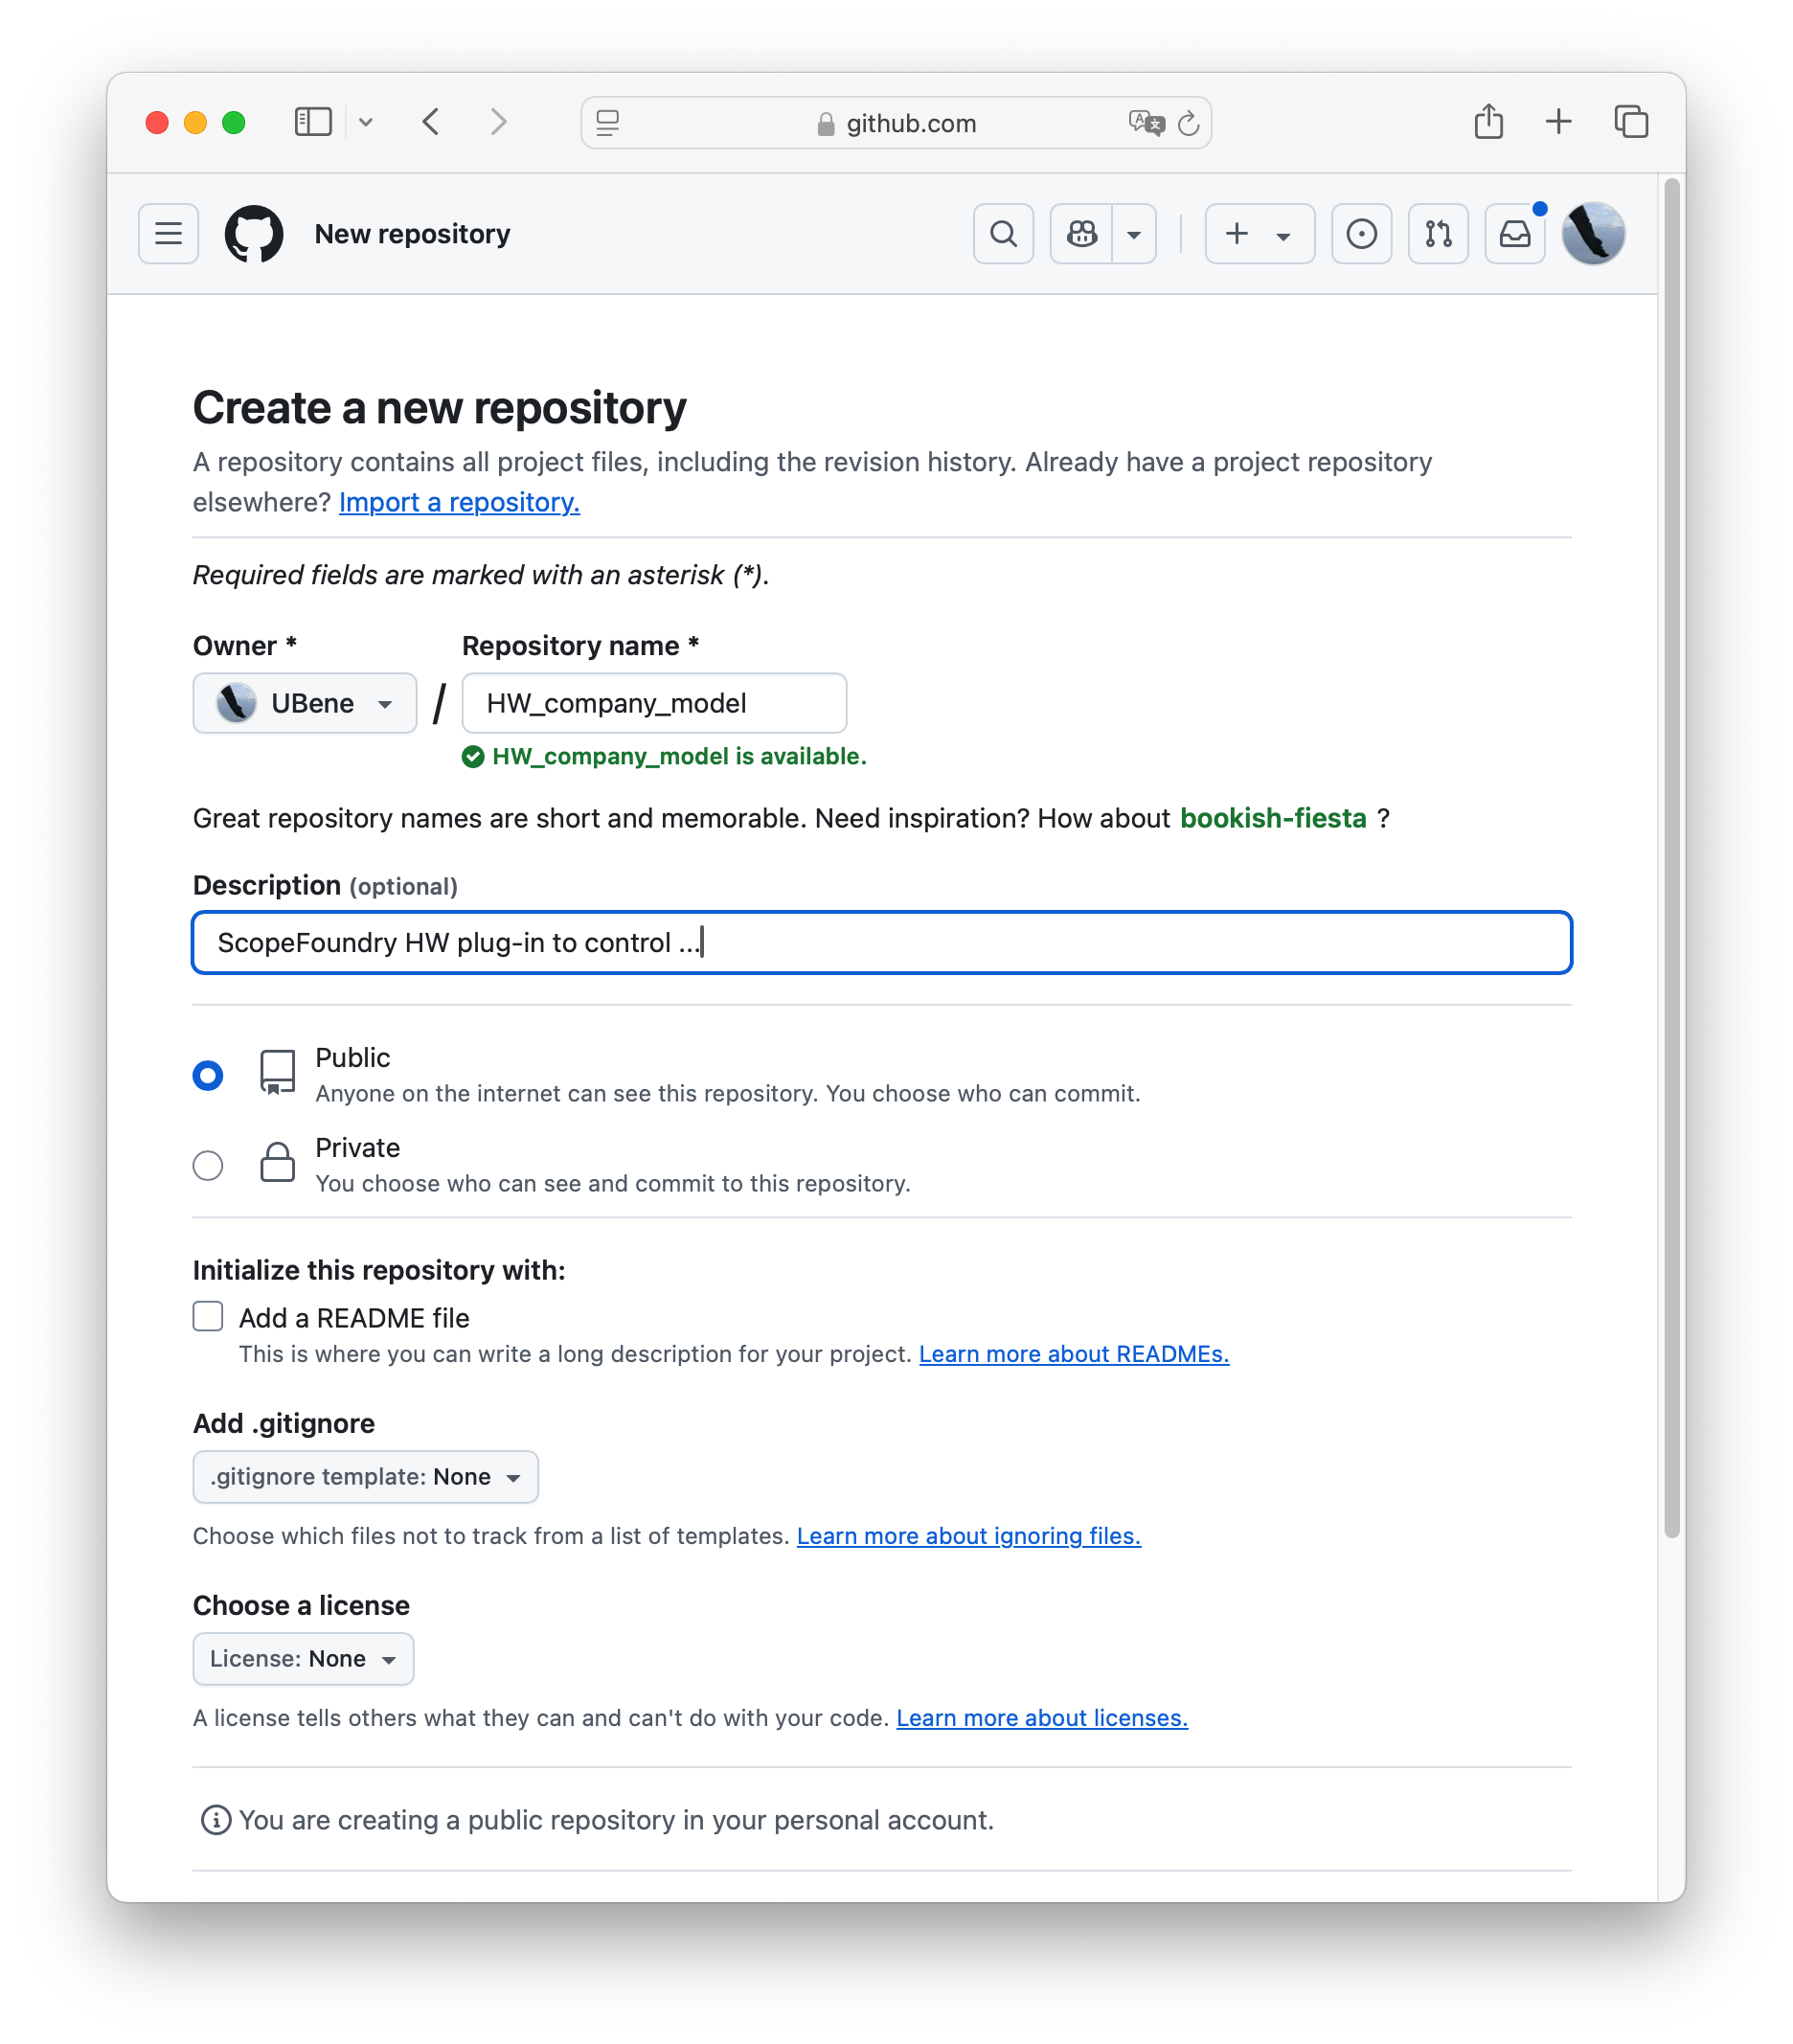

Push your code to the remote repository:
git remote add origin https://github.com/{USER_NAME}/HW_{company_model}.git
git branch -M main
git push -u origin main
For git experts.
Package a HW component (for distribution with pypi).