New Microscope App
Requirement: Install ScopeFoundry.
After installation, use the Anaconda prompt and navigate to where you want or have the source code for your setup. Start ScopeFoundry tools:
# cd "to/your_project_folder"
conda activate scopefoundry
python -m ScopeFoundry.tools
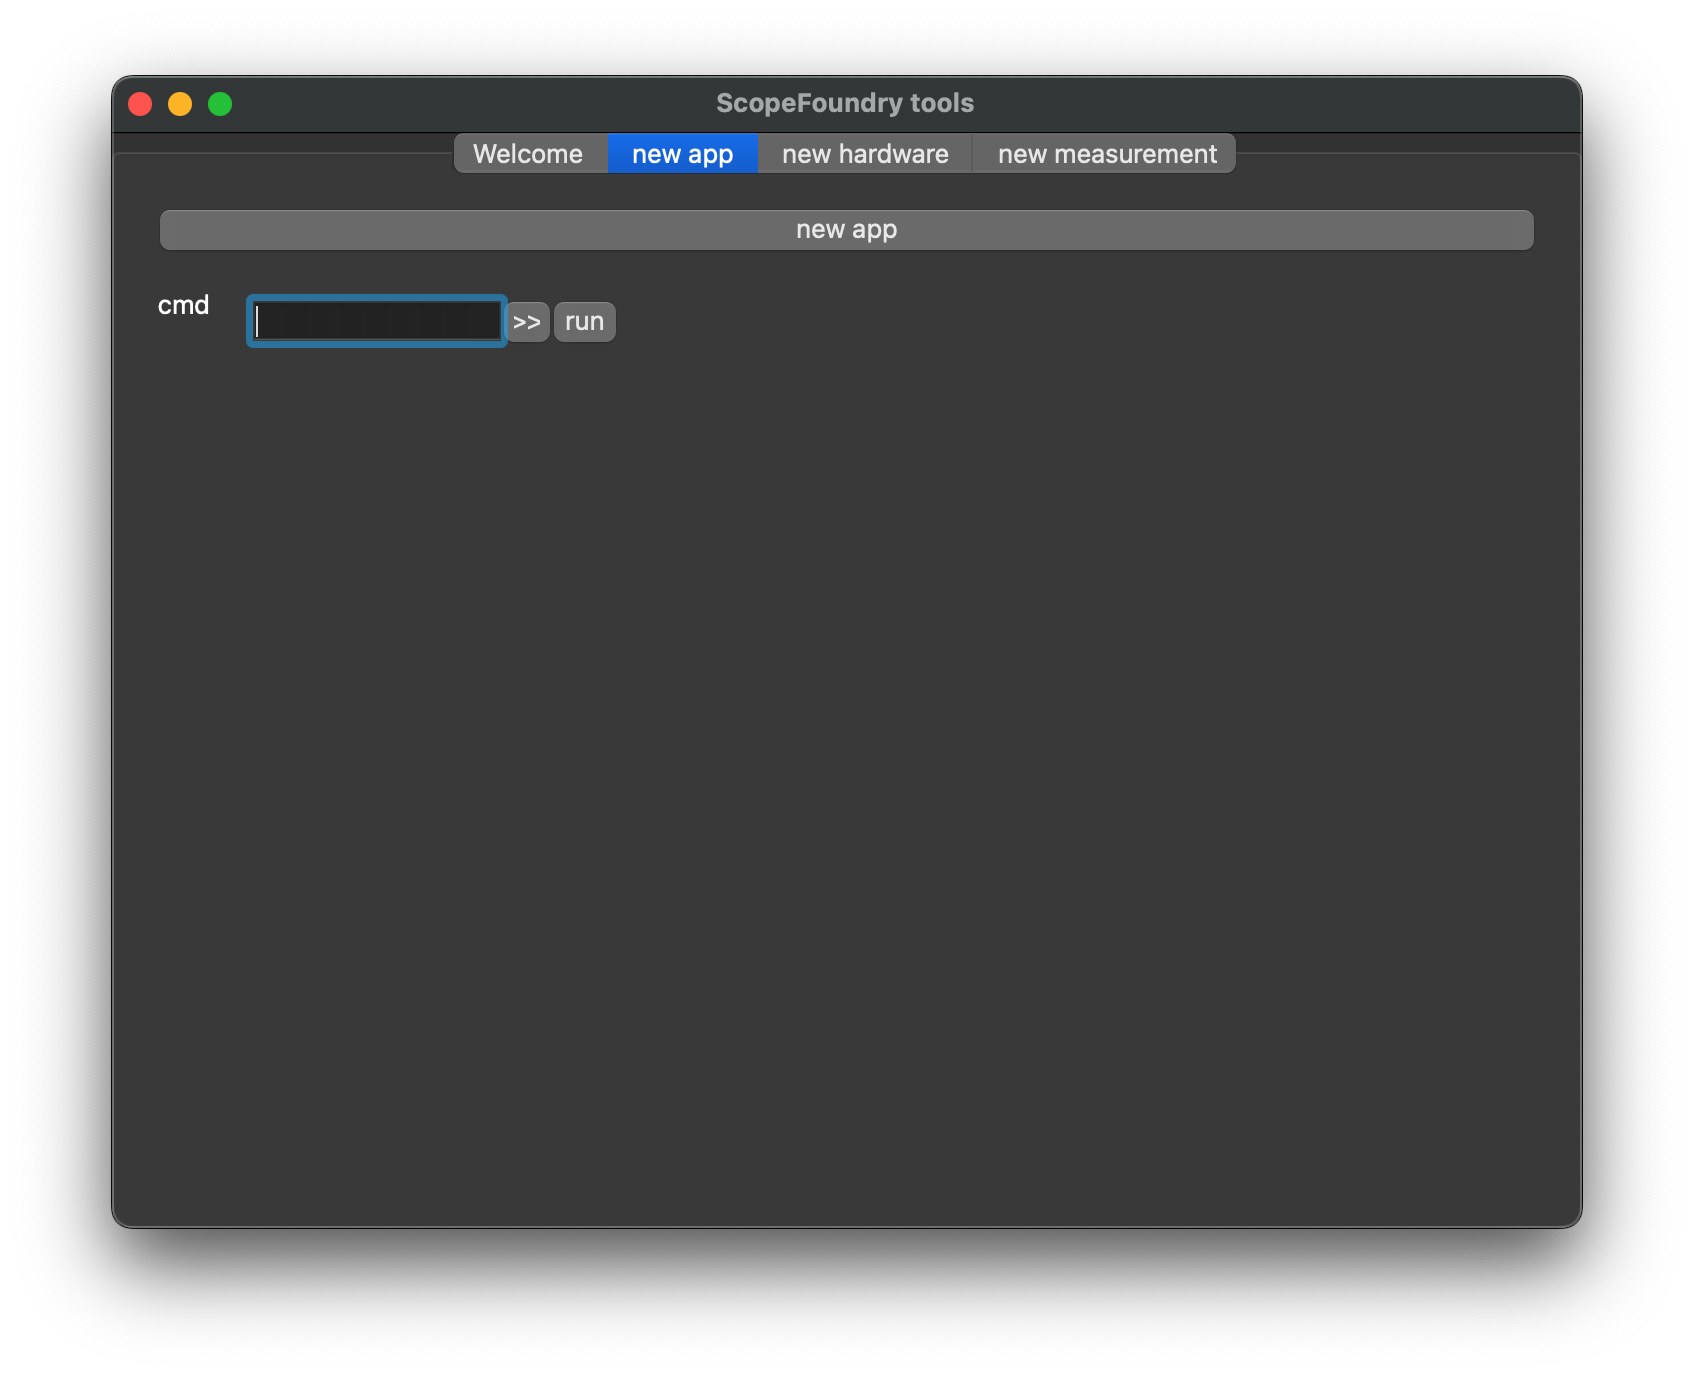 Go to the
 new app and press new app. This copies the ScopeFoundry example files to your project folder. In your Anaconda(3) prompt, run:
python fancy_app.py
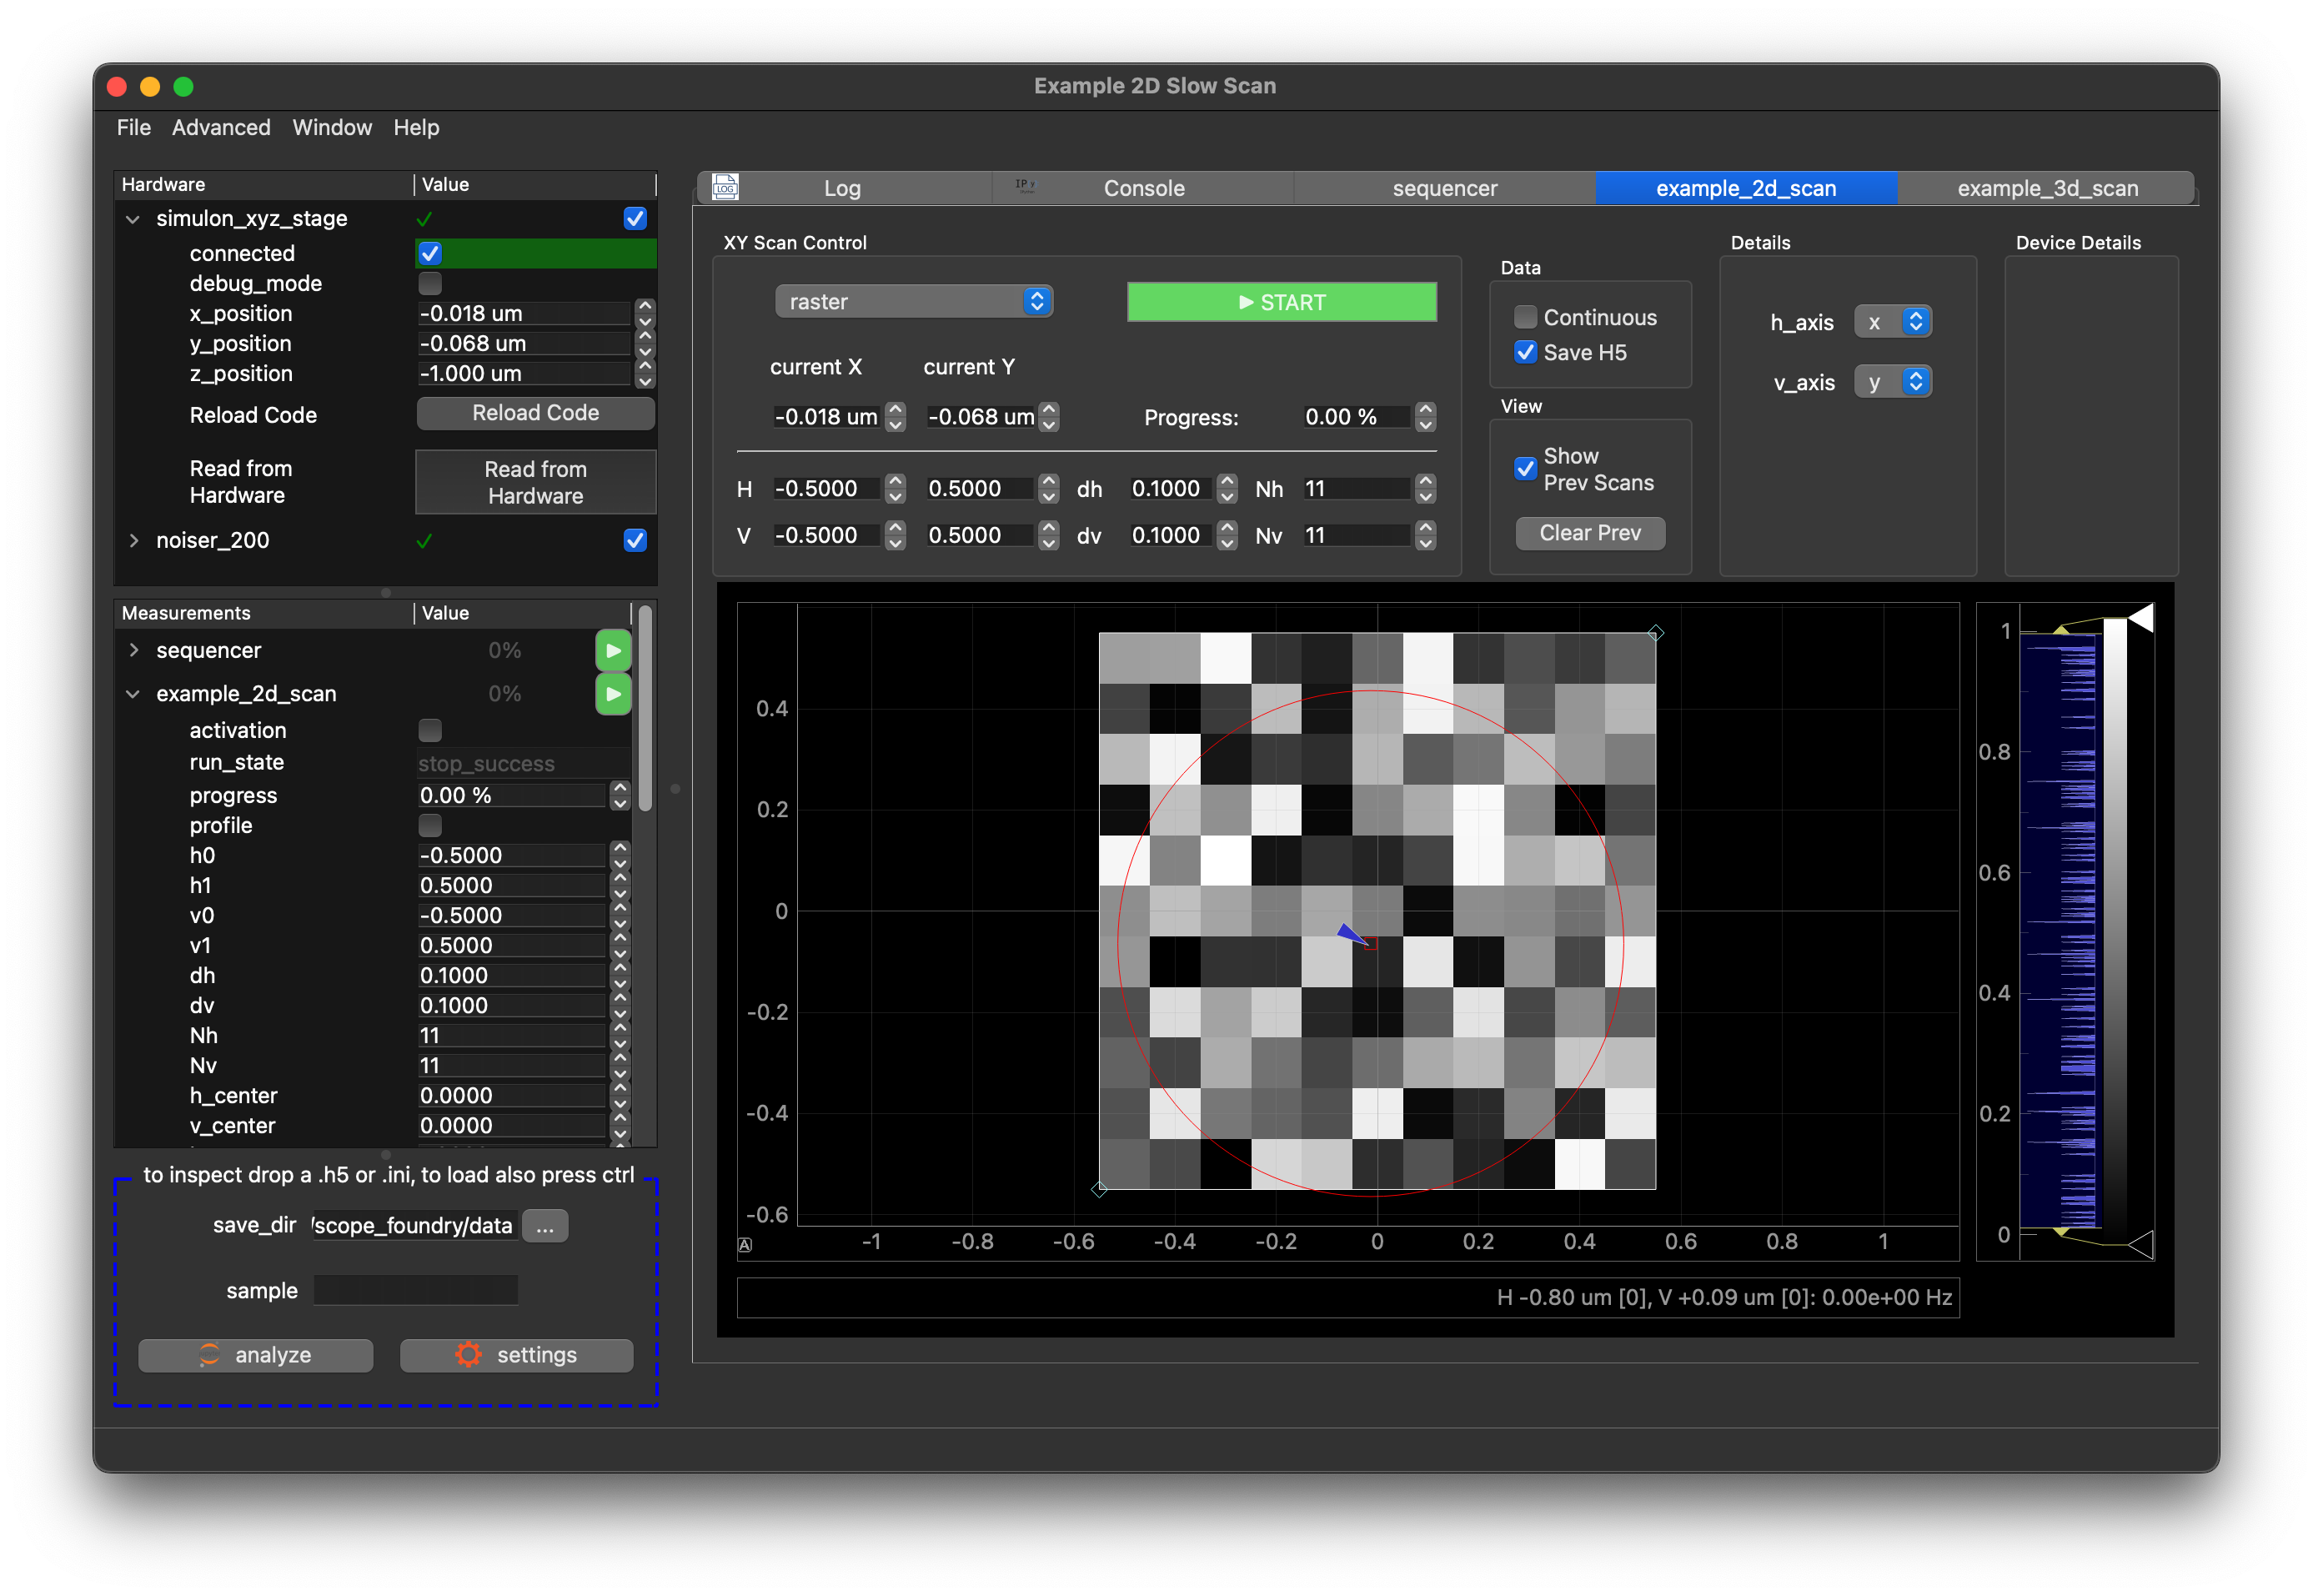
You should see:
Key Takeaways
Now is a good time to learn the bare minimum about ScopeFoundry. On the left panel, you see two lists:
Hardwares: These are subclasses of
HardwareComponent. Their job is to establish a connection to your hardware and provide methods to write and read values.Measurements: These are subclasses of the
Measurementclass that define the procedures for acquiring and saving data. They can have graphical user interfaces shown on the right. Can you start theexample_2d_scan?
Note that you can expand the items in either list to expose their settings. Settings show the state of the hardware or parameterize your measurements.
Folder Structure
For your project, we recommend the following folder structure:
├── your_project_folder/
    ├── ScopeFoundryHW/
        ├── company1_model1/
            ├── company1_model1_hw.py
            # optional:
            ├── company1_model1_dev.py
            ├── company1_model1_test_app.py
            ├── Licence
            ├── README.md
            ├── company1_model1_readout.py
            ├── docs
                ├── links.json

            **

    ├── measurements/
        ├── your_measurement_1.py
        ├── your_measurement_1_docs # optional
            ├── links.json
        ├── **

    ├── fancy_app.py
    **

    # after databrowser tutorial
    ├── viewers/
        ├── images.py
    ├── fancy_data_browser.py
In particular, the folder contains:
A subfolder
ScopeFoundryHWcontaining hardware control code. There must be at least one file, typically ending in_hw.py, that contains a subclass of typeScopeFoundry.HardwareComponent.A subfolder
measurementscontaining files withScopeFoundry.Measurementsubclasses. However, measurements that are associated with just one Hardware component are sometimes placed directly in the resp. ScopeFoundryHW (herecompany1_model1_readout.py).A main file, here
fancy_app.py. This is the file that gets run at start-up, i.e. is the entry point to your application. That file contains aScopeFoundry.BaseMicroscopeAppsubclass that composes subclasses of Measurements and HardwareComponenets.
The optional docs and *_docs folders will be generated - see Document your Components.
Next Steps
You have created your first microscope app and learned the three most important high-level concepts: HardwareComponent , Measurement and settings. To build a system that allows you to perform real scientific experiments look at tutorials on how to build:
- A custom Hardware Component.
- A custom Measurement.
Or make a quick detour to set up an developement environment.